
How I Get 250+ Email Sign-Ups Each Month with Flodesk
Building an email list is one of the smartest moves you can make if you want to sell more digital products and create a reliable stream of customers. Unlike social media, where algorithms can change overnight, an email list gives you direct access to your audience, allowing you to nurture leads and drive consistent sales.
In this post, I’ll walk you through my exact Flodesk setup, including a step-by-step Flodesk tutorial on creating high-converting pop-ups and automating your email marketing (as well as giving you 50% off your first year!). I’ve grown my list from 0 to over 7,000 subscribers through the automated systems I’ve set up (all in less than 3 years!)
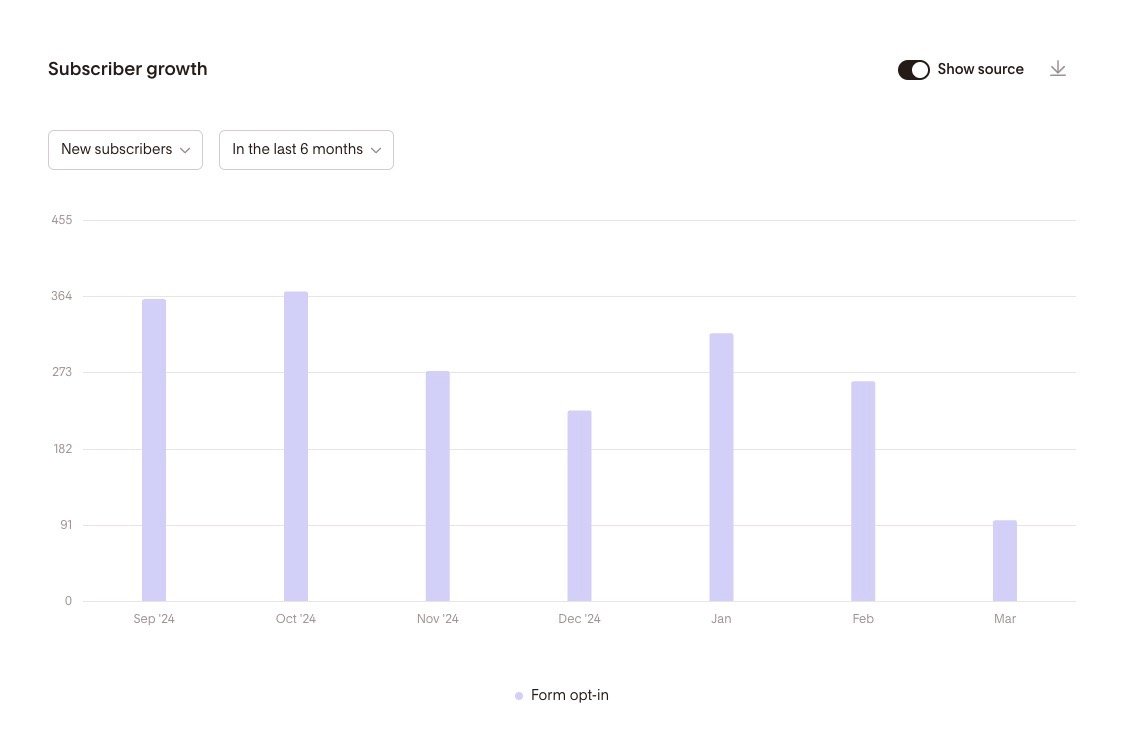
Most of my sign-ups come from organic traffic to my blog posts and as you can see it’s pretty consistent over time. I find that my effort goes a long way if I create a blog post that drives traffic vs. only creating content on social media.
Why Every Online Business Owner Needs an Email List
Building an email list is one of the most valuable assets for an online business owner. Did you know that for every dollar you spend on email marketing, the average return is $42? (study by Investors Club)
Unlike social media, where algorithms can change overnight, an email list gives you direct access to your audience. When TikTok shut down in the US temporarily in January 2025, I skipped the stress because I knew I had my email list set up and ready to go!
Why I chose Flodesk for my digital product business
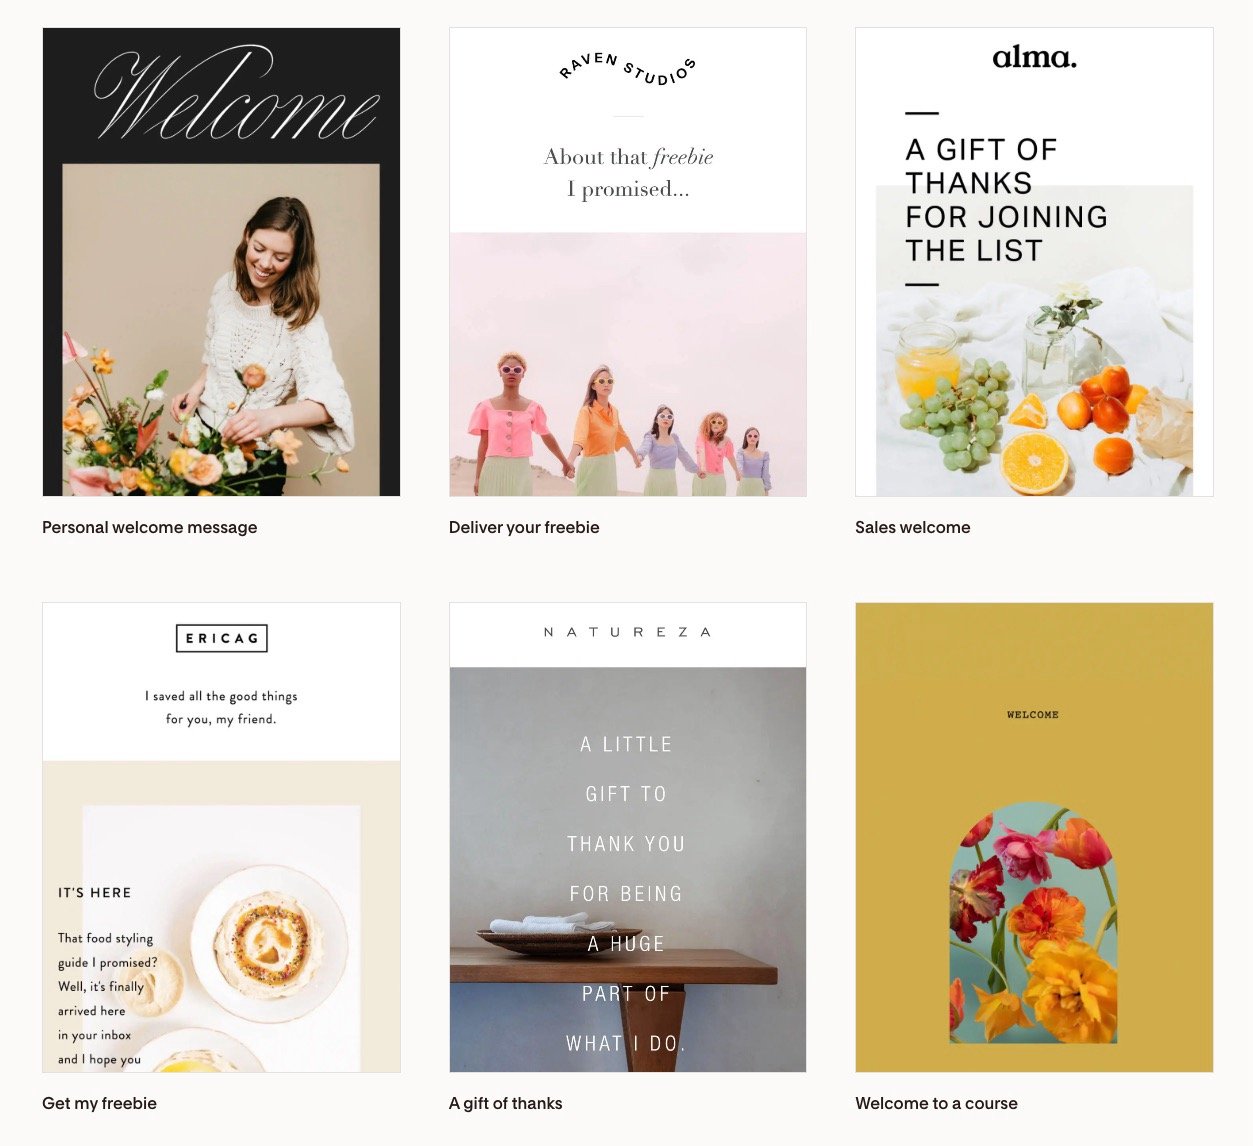
I started with the email tool integrated in my website but quickly started looking for other options when I realized the features weren’t what I actually needed. I needed more advanced flows and organization for my emails. The design of the Flodesk templates was another big driver for me. Having an email that looks like it’s professionally designed is a great way to set the tone for what to expect when joining your email list.
These are the specific features I needed:
Being able to deliver multiple lead magnets (free opt-ins) and also control the customer experience after.
Needing to create forms to gather the email addresses that converted better.
Being able to understand my audience better and manage the analytics.
Having more control over the designs. I wanted my emails to look more high-end and less generic.
Now that you know why I opted for Flodesk, let’s walk through exactly how I set everything up.
How to Set Up Your Email List with Flodesk
Step 1: Create a Free Opt-In
To encourage sign-ups, you need to create something to offer to your audience in exchange for their email. You’ll hear this called a lead magnet, opt-in, or freebie.
Some lead magnet examples:
A downloadable checklist
A template
A free guide or tutorial
A mini-course
Make sure your freebie is relevant to your audience and provides immediate value. It should provide enough information to show you’re an authority on the subject, but not so much that it takes away from your paid offers. Using Chat GPT to brainstorm ideas is a great way to find the perfect first opt-in.
I create my opt-ins in Canva and share them as a PDF or public view link, but feel free to use any tool that works for you. It can be as simple as a Google Doc!
I’ve personally really liked switching to the public view link option under the Share menut in Canva because PDFs are cumbersome for people to keep track of and it makes it easy for me to make updates on the fly without having to re-upload files everywhere.

Step 2: Set Up Flodesk
Once you have your freebie ready, it’s time to create your email sign-up system.
Sign Up for Flodesk – If you don’t already have an account, you can get started with my Flodesk discount code for 50% off your first year.
Flodesk will guide you through the steps, but you can also see here what information you need to enter.
Create a Segment – Segments are basically tags that you can use to organize your audience. Since you’re starting with an opt-in, I recommend creating a segment named after that opt-in. This will allow you to target those subscribers based on interest in the future.
To add a segment, go to the “Audience” tab, click “Segments” and “New Segment.”
Step 3: Create a Form to Collect Email Addresses
Now that you’ve got all the basics set up, it’s time to start collecting emails! If you have a website, I recommend using a pop-up. If you don’t have a website yet, you’ll want to use the Full Page style form.

Flodesk offers a variety of pop-up types that you can test with your audience
Option 1: Use a Pop-Up on Your Website
Flodesk makes it easy to create a high-converting pop-up:
Log into Flodesk – Navigate to the ‘Forms’ section.
Create a New Form – Select the ‘Pop-up’ option.
Choose a Template – Pick a pre-designed Flodesk template.
Customize the Design – Add your branding, colors, and copy.
Set Display Preferences – Choose when and where the pop-up appears.
Connect to Your Email List – Assign new sign-ups to the correct segment.
Publish and Embed – Copy the provided code and add it to your website.
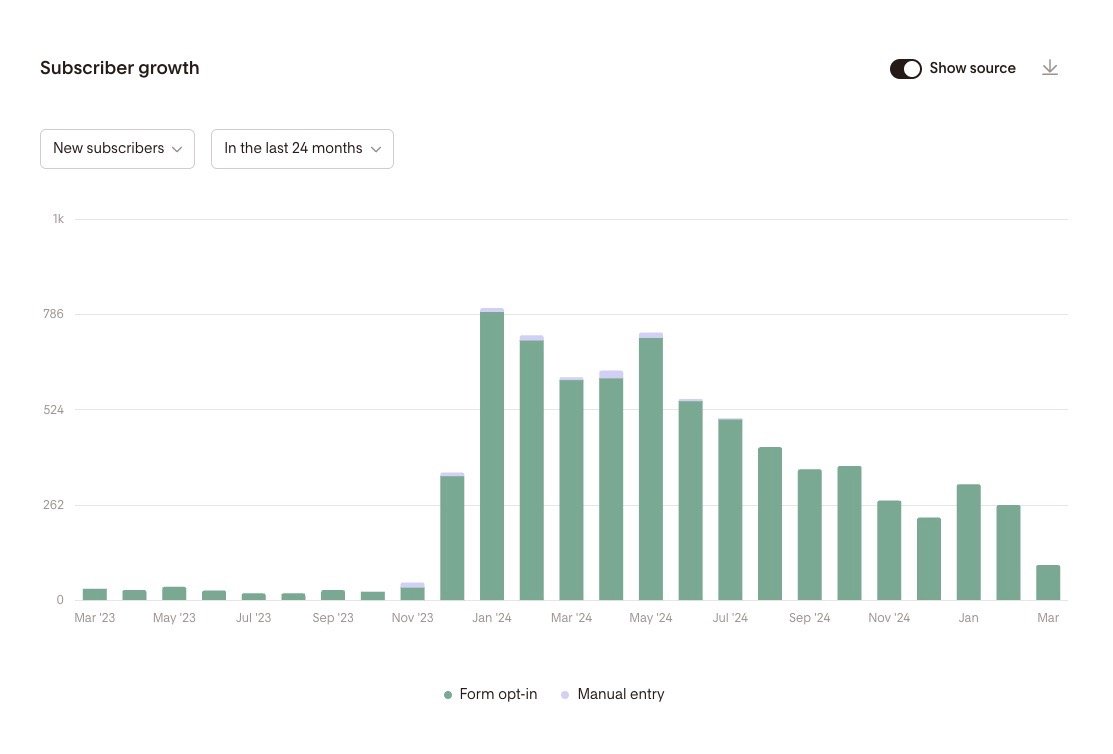
For months I was collecting emails only through my link in bio/social media, but the momentum really started once I implemented a pop-up on my website. I had initially avoided a pop-up because I didn’t want to negatively impact the user experience of my website.
After doing some research, I decided to test it out with a pop-up that appeared after someone had been on my site for a while, was easily dismissable, and didn’t show to returning visitors. The graph below shows the impact this small change on my overall sign-ups and it’s safe to say that I’m so glad I did this!
Option 2: Collect Emails Without a Website
No website? No problem! You can collect emails using Instagram and ManyChat. If you’ve seen people on social media commenting a certain word, that is ManyChat in action.
Set Up a ManyChat Automation – Create a flow that sends a link to your Flodesk form page when someone DMs you a keyword (e.g., “IDEAS”).
Step 4: Create a Workflow
A workflow is almost like a Madlibs that tells the system what to deliver and to who. This ensures new subscribers receive your freebie and an introduction to your brand right away. It’s super easy to set up and Flodesk has a video tutorial through Flodesk University here.
Once you’ve completed the steps I’ve listed you should have:
A lead magnet/opt-in designed and ready to go.
A Flodesk account with 1 segment for your opt-in
A Flodesk form to collect email addresses
A workflow in Flodesk that will deliver the opt-in to the email address collected in the form.
It’s a good idea to give your setup a test run by entering your own email and making sure everything delivers as it should. After that, all you need to do is start sharing your opt-in with your audience! Here are some ways to do this:
Setting up a Link Tree and linking your opt-in at the top. Be sure to call this out in your bio to encourage people to click through your link.
Creating content surrounding your opt-in and sharing consistently on social media.
Including an option for buyers to opt-in to your email list during checkout.

Flodesk Cost & Discount Code
One of the biggest advantages of Flodesk email marketing is its flat-rate pricing. That means that unlike other tools, you won’t have to pay extra once your audience grows past a certain threshold of subscribers.
Flodesk cost: $38 per month for unlimited subscribers and emails.
A Flodesk coupon code for you: Get 50% off your first year, bringing the cost down to just $19 per month.

Conclusion: Flodesk Tutorial & Discount Code
I’ve been using Flodesk for over 3 years now and it has cut the time it takes me to create and send emails in half, allowing me to focus my attention on other areas of my business. Once I had that first workflow and form designed with my branding, I was able to duplicate it as needed as my business grew.
I can quickly hop in and design something beautiful without needing to know any code and they’re always adding more features designed to help my templates sell. Be sure to look for the countdown timer block if you’re having a sale or the poll block option if you’re looking to get to know your audience!
If you want to get 50% off your first year, you can sign up through my affiliate link here.